Most of us public-safety-vehicle ‘geeks’ love lights. What’s not to like about a fire truck or police car with a ton of blinky lights on it? It takes us back to playing with toys when we were 8 years old!
However, it’s probably obvious to you that warning lights are serious business. The sole purpose of emergency warning lights are to save lives. Sometimes we see people (upfitters, as well as end-users) design lighting packages that look cool, rather than performing the functions that we need them to perform.
There are a number of considerations when selecting perimeter-mounted lights (we have another blog entry that details Lightbar selection , so we’ll focus on perimeter warning lights for the sake of this article);
– size
– colour
– flash pattern
– placement / location on the vehicle
Light Size
Generally, the larger the light the better. While a larger light may or may not be technically “brighter” than a small light, the signal size of a large light is larger than a small light (makes sense, right?). This is why things like traffic stop lights are 8-10″ diameter, not 1″. Of course, sometimes it’s not possible to use a large 9″ x 7″ fire truck light on a smaller vehicle like a Tahoe, but generally speaking, from a safety perspective, the larger lights are better than smaller lights, even if the light output energy (lumens, as it’s usually rated as) is the same between the two.
Colour
While each region has its own colour permissions/restrictions for various vehicles, there are 4 main light colours that are generally accepted in Canada;
– Red
– Blue
– White
– Amber
Colour is important for a few reasons;
1) The human eye perceives different colours differently depending on the ambient light. This can mean a colour that works well during the day (blue, for example) is horrible at night.
2) Colour means something to drivers (we’re talking about other drivers on the road, not the driver of the Emergency Vehicle). For example, Red is pretty much universally recognized as an Emergency Vehicle colour. Amber is generally identified as a roadway hazard / construction / tow vehicle. Likewise, some colours don’t mean much to motorists – for example, flashing white. If you ask 10 people what flashing White means if they see it on the roadway, most will likely have no answer. If you ask the same group what flashing Amber means, they’ll all say “hazard” or “construction”, etc. So, colour plays an important role in communicating a message to motorists.
We regularly encounter customers who want white flashing light as a primary warning colour. We’ve also noticed that here in British Columbia (our home turf) there have been some construction companies using amber and white flashing lights on the highway (in BC, only flashing Amber is permitted, they’re not allowed to use any other colour, including White).
The justification we normally hear for selecting white is “it’s the brightest colour”. Let’s unpack that a bit;
Back in the halogen/strobe days, yes it’s true that White was technically the brightest colour. This was because halogen and strobe lights (by “strobe”, we mean true strobe lights; gas-filled glass tubes, much like a flash on a professional camera. These days the term “strobe” has been taken to mean anything that flashes) emitted pure white light, in order to produce a colour out of them, one had to add a coloured filter over top of them. This filter (red, blue, amber, etc.) would filter out all the light that was NOT the colour of the filter. Thus, a red filter on a white halogen bulb would eliminate all colours except red, and therefore the colour the motorist saw was Red. Of course, this means that you lose a lot of light energy that didn’t pass through the filter. So, technically, white was the brightest because it had no filter, and therefore emitted 100% (or nearly so) of the light energy that the bulb produced.
However, everything changed in about 2005 with the advent of LEDs as warning lights. Ironically, white is the DIMMEST colour of all the 4 colours used in the industry. White is not a natural colour for LEDs, so to get white, the industry has to mix other LED colours (within the LED chip) to make it emit white. This is why the original white LEDs in lightbars were an odd colour (off-white, kind of yellowish, or even a blueish tinge). Red and Amber are both “natural” LED colours so they don’t require any fancy chemistry. Thus, they are also the brightest colours.
As noted above, white also doesn’t convey a message to motorists. It’s often overlooked that lights (and arguably, siren) need to do three things in order to be effective;
1) They must be seen (detected) by the motorist
Fortunately, this is generally the easiest factor to address. Lights are very bright (some would argue, too bright). This is where most people focus their energy in designing a lighting system; they use lots of lights, and flash them in wild patterns, under the theory that motorists can better detect lights that are configured in this way. However, that’s not necessarily the case.
2) They must communicate a clear message to the motorist.
We generally do this by using colour, but sometimes using patterns (such as a sequenced directional arrow). Part of this message must be depth perception; it’s critical that the motorist can tell WHERE the light is in terms of distance relative to their car. Part of communicating this message is to do it clearly and with the appropriate amount of urgency. People generally associate flash speed with urgency (a light that flashes quickly conveys more urgency than a light that flashes more slowly).
3) They must provide effective warning at a distance
The motorist needs to have enough time to process the message that the lights are communicating, AND have enough time to take action to implement the message (move over, stop, etc.). While factors such as where you stop on the side of the road (i.e. – just over the crest of a hill is not a good idea, as people come over the hill and are surprised by a vehicle stopped right there), from a lighting perspective this is achieved by intensity (brightness). As a general theory, a brighter light is visible from a longer distance than a dimmer light is. While it’s natural to think that more distance = better, consider that people may not need to see you at 5km away. 2km away may be more than adequate, for example. Thus, you may not need the absolute brightest light you can get – rather, focus on colour selection, light placement, and flash patterns. Would you buy a patrol car that is more expensive than the other but does 240km/hr whereas the lower priced will “only” go 200km/hr? Maybe yes, but often no.
Flash Patterns
There’s probably no quicker way to get into an animated discussion with a warning light ‘geek’ than to discuss flash patterns! Before we get into talking specifically about patterns, let’s remember one critical thing that most people overlook; the lights on the Front of your vehicle do a very different job than the ones on the Rear! Have you ever thought about that? Most people have not considered that front-facing lights (FFL) are primarily for clearing traffic. Rear facing lights (RFL) are primarily for warning traffic while stopped at a scene.
If you agree that FFL and RFL are primarily for different purposes, then why do most upfitters treat them the same? Now we get it – when you’re at a scene, you may be parked sideways or even facing oncoming traffic, so then your “front” lights are doing the work of your “rear” lights, essentially. But, just to simplify, let’s assume you are parked in a lane of traffic on a highway after getting to a car crash or similar, and your car is pointed the same direction as the prevailing traffic on the roadway.
FFLs have to serve two purposes; clearing traffic on the way to a call, and then transitioning into “at scene” mode when you arrive at a scene. Remember that when you are clearing traffic, the motorists are generally not looking in the direction of your vehicle. Whether you are coming up behind a motorist (they’re looking forward, and you’re approaching from behind), or you are trying to get through an intersection (cross-traffic is looking perpendicular to your direction of travel), in neither case are motorists looking directly at your vehicle. This is why we use sirens; they provide warning information to motorists because eyes see things in a directional method (straight ahead and a bit to each side) but ears detect sound from all directions.
So, if we assume that Clearing mode means you are trying to get the attention of people who are not looking at your vehicle , how do we do that (other than sirens, which have a limited detection distance)? The answer is; lots of activity and lots of intensity. This is where the crazy fast flash patterns with different colours (including white!) are ideal.
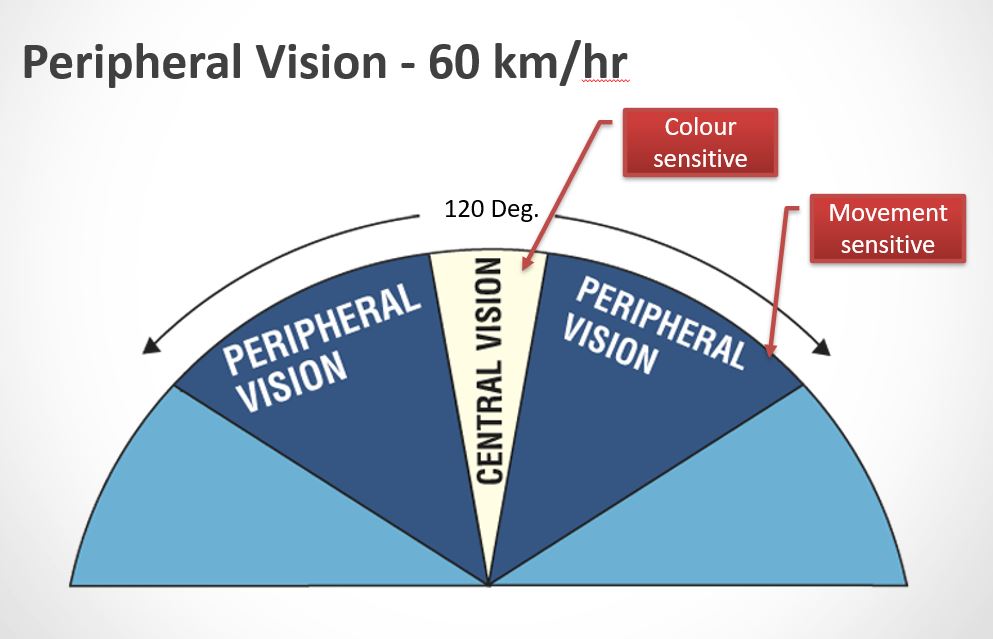
Consider that the human eye has essentially two vision types; center vision is highly sensitive to colour, but not so much to activity. Peripheral vision is the opposite; nearly colour-blind but highly sensitive to movement. So, if you’re trying to get people to see you “out the corner of their eye” (peripheral vision) then colour is not as important as activity. The net result of someone detecting your rapidly-flashing light is; they turn their head to see your vehicle, recognize the urgency (fast flash pattern) , and hopefully get out of your way.
Let’s shift to RFLs now. Under the same human-eye theory, consider that most people approaching your vehicle from the rear are looking in the direction of your vehicle. If you are stopped on the roadway and trying to warn motorists coming at you from behind, they are all generally looking in your direction already. This makes the “detection” part of the warning light setup relatively easy. Now we can focus on communicating the message in an appropriate urgency level.
This is where larger lights and slower flash patterns (and NO WHITE) are ideal. A calmer flash pattern is perceived as lower urgency than if your rear lights were all flashing really quickly. Whether this is one of the DVI/FSFade patterns (be careful, some don’t meet SAE/NFPA requirements) or simply a slower standard flash pattern, they are excellent for at-scene warning that creates a calmer scene. Calm people generally make better decisions, and since drivers can see your vehicle from a long way off, they have plenty of time to take action assuming the message is clearly communicated to them. Of course, as previously noted, sometimes you may be parked sideways or head-on to traffic, so it makes sense for ALL the lights on your vehicle to go to a slower flash pattern and no flashing white. Calmer lights also make the vehicle easier for your crew to work around (standing beside a fast-flashing light for 4 hours at night is a horrible experience).
To summarize;
Clearing Mode; High activity / high brightness flash patterns to front and side of vehicle, use all colours including white. Rear of vehicle can remain a slower flash pattern so as not to dazzle other response vehicles that are behind you.
At Scene Mode; Slow down the flash patterns, use colours that clearly communicate your message (no white), without panicking/confusing motorists
Pattern Synchronization
Syncronization of patterns between multiple vehicles at a scene has been a hot topic in the upfitting industry for the past few years. Initially, many thought it was a marketing gimmick, but as the technology developed and was deployed, it has proven itself to be useful in “scene calming” where multiple vehicles – all with warning lights flashing – are together at a scene.
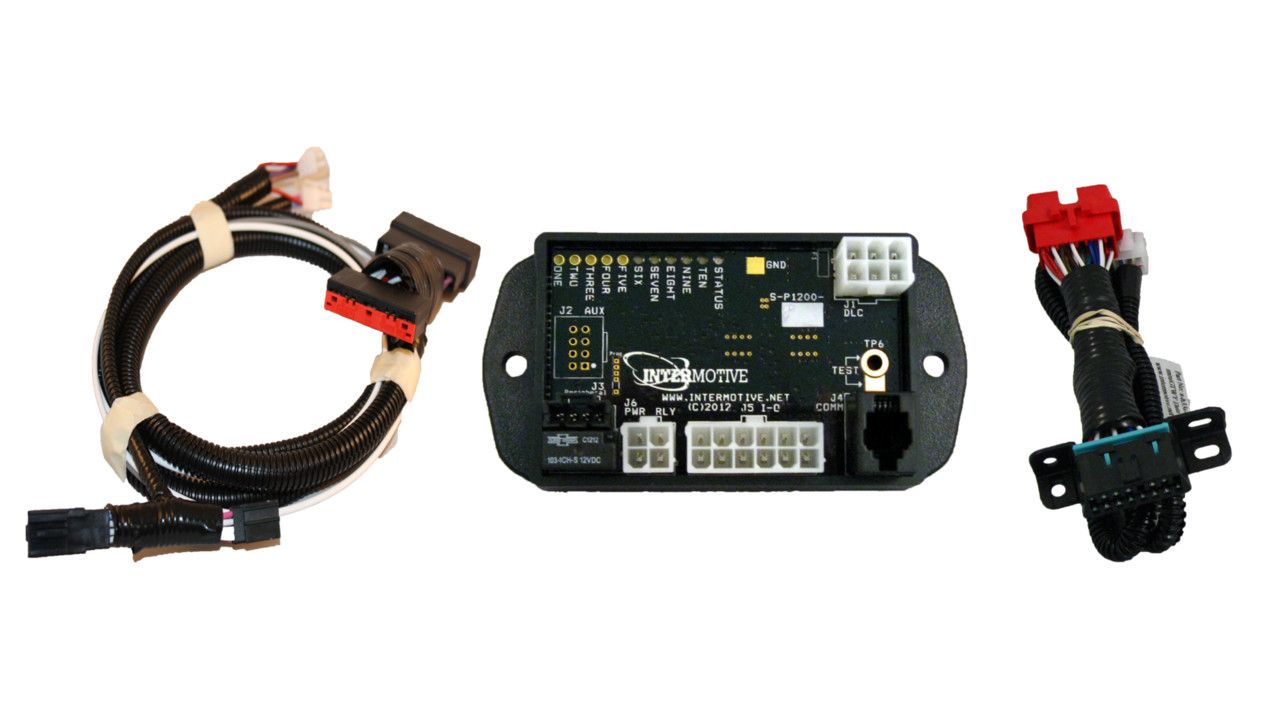
There are various names for this technology, depending on the manufacturer. You might see terms such as FS Sync, V2V Sync, etc. It should be noted that the vehicles’ warning systems are not actually talking to one another to coordinate flash patterns. Rather, the sync function uses a GPS timing reciever mounted in the vehicle somewhere (or integrated into the lightbar) to use precise GPS timing. Then, assuming all the vehicles’ light/siren controllers are programmed identically (a mandatory for this type of sync), the controllers all start their flash patterns on a certain ‘beat’ of the GPS time. This can result in a very slight delay (up to 1 second) of the lights illuminating when you turn them on, but it’s not noticable.
Synchronization between vehicles is a good option to consider if you regularly have multiple vehicles from your agency at a scene.
Downsides;
a) all vehicles must have the same light/siren controller brand (various brands cannot sync with each other)
b) cost increases a bit as the GPS timing modules, which plug into your light/siren controller, are a few hundred dollars
Dimming
We’ll sneak this into the conversation (no extra charge!) as it’s a question we often get asked. Most warning lights/lightbars can be dimmed. Many offer levels of dimming, too. The installer can choose on a slider in the programming software what “dim” means (50% intensity? 20%? 85%?). Of course, lights are dimmed only at scene, not in Clearing (en route to a call) mode.
The premise of dimming is for scene calming so the light don’t “blind” (dazzle) motorists. While it is effective for that purpose, by dimming the lights you reduce intensity (no surprise there), and if we agree that intensity = warning distance, dimming your lights reduces your warning distance.
We would suggest Dimming as a last resort. First, try slowing down your flash patterns as discussed above, and see if that gives the desired outcome. If not, then disable some of your warning lights (subject to NFPA / SAE requirements for light positions). If you have 10 lights on the back of your Tahoe, rather than dimming all 10 of them, try turning 6 off and leaving the remaining 4 at full intensity (at a slower pattern). This will still reduce the total light output because you’re turning off lights, but will keep the remaining lights at full intensity, therefore maintaining your warning distance. Light doesn’t multiply itself so having 4 lights at full intensity doesn’t give you less warning distance than 10 lights at full intensity. Likewise, doubling the number of lights doesn’t double the warning distance.
It’s also important to remember that people detect contrast, not just the lights. This is why we flash lights, rather than steady-burn all our warning lights. The OFF time is just as important as the ON time. The off-to-on intensity change (0 lumens -> 2000 lumens or whatever the light emits) is what is detected by the human eye. If you don’t believe this, then look at a flashing light from 500m away, and a steady-on one, and see which you think has the most attention-getting characteristic.
So, dimming your light reduces that off-to-on intensity delta. For the sake of simplicity, let’s say your warning light emits 1000 lumens (lumens isn’t a great measurement for this but let’s just roll with it) at full intensity. If you are flashing that light, the motorist gets a 0-1000-0-1000-0 lumen cycle. If you dim that light to 50% , then they get a 0-500-0-500-0 cycle, right? That’s great, but what if there are other lights around the scene (scene lights on a fire truck, oncoming headlights from the other lanes, etc.) ? Now the dimmed light doesn’t “overpower” the ambient so you’re not really getting Zero as your “off” number, but rather whatever the ambient is. If the ambient light is close to the output of the warning light, the motorist has no contrast and won’t see the light as easily.
Essentially, your warning lights not only need to be the brightest signal at the scene, they need to be significantly bright enough to create a noticable contrast over and above the ambient light. A flashlight shining at you from 100m away is not nearly as “bright” on your eyes at mid-day on a sunny day as it is in pitch black, is it? Technically, it is – the flashlight itself is emitting the same power, but the ambient light is making it appear dimmer vs. night time. Warning lights are no different.
In the images below, the same yellow circle is shown on two different backgrounds…


Light Placement
If you’re still with us, thanks for continuing to read, and we applaud your interest and dedication to warning systems!
Most police/fire/EMS vehicles (light-duty vehicles such as pickups and SUVs, for the sake of this article) have one of two kinds of lighting systems;
– marked (rooftop lightbar)
– unmarked (no rooftop lightbar, usually reduced perimeter lights)
We have noticed a lot of agencies tending towards unmarked (sometimes called “slick top” ) vehicles lately. The justification is usually because the vehicle is a take-home vehicle (normally in Fire departments only), or admin vehicle, etc. This is often paired with subtle graphics (or no graphics at all).
Most front-line police and fire vehicles are marked, though.
Consider the lightbar; its SOLE purpose in life is to provide warning light to help keep you safe. Ok, maybe not its SOLE purpose because it can also provide scene light, but you get the point. Having a lightbar on your roof is the safest warning setup, bar none (pardon the pun). In our opinion every other lighting system (full width interior bar, etc.) have significantly less warning power. We discussed Lightbars in a previous blog, though, so we won’t dwell on this point. Just know that if you are driving a vehicle without a lightbar on the roof, you need to be extra careful because of the lack of warning power a lightbar provides.
Perimeter Lights can mean any light around the perimeter of the vehicle (as opposed to a rooftop lightbar). This includes Grille, front fender, rear tailgate, etc. lights.
Grille Lights
Good grille lights are critical for effective traffic clearing. While we often depend on headlight “wig-wags” (alternating high-beam headlights), many vehicles these days come with LED headlights that cannot be flashed with an aftermarket flasher. Most “Police” vehicles (Ford Police Interceptor, Dodge Durango PPV, Tahoe PPV, etc.) have factory headlight wig-wags which is fantastic, because these are by far the most effective lights for long-distance front warning.
Consider that front warning is the THIRD most important warning type…kind of. The #1 cause of crashes with emergency vehicles in getting T-boned at an intersection (statistically, on the driver’s side). The #2 is rear-end collisions (getting struck from the rear while stopped). If your front facing lighting is a bit sub-par, it’s an inconvenience and may delay you getting to a call, but generally doesn’t cause fatalities (ok, it could cause a fatality at the scene if you don’t get there quickly enough, but we’re talking about emergency vehicle crashes). While most people put the majority of their focus on front-facing lighting, consider that Intersection and Rear Facing lighting may justify more of your lighting budget than front facing. Everyone’s situation is different, but something to consider.
You can get pretty innovative with your grille lights. We generally suggest multi-colour lights such as dual colour red/white. This allows you to use red/white in Clearing mode (high activity / high intensity!) and then turn off the whites in At Scene mode. Many customers use 4 or even 6 grille lights. If you’re going to use only 2, make them larger lights (7×3 for example) if possible. Some of this will depend on the design of the vehicle’s grille, as there are some pretty wild grilles out there these days which makes mounting lights on them pretty tricky. You can also mount lights behind the grille but they are not as effective, especially at intersection angles (45 degrees from direction-of-travel).
A trick we often use; if you are installing a pair of driving lights on your vehicle during the upfit process, we can wire these to flash in warning mode! These emulate headlight wig-wag functionality and can be incredibly effective at long distances. It doesn’t work so well with Fog lights (short but wide pattern). It works best with Driving beams (long range, not a wide pattern).
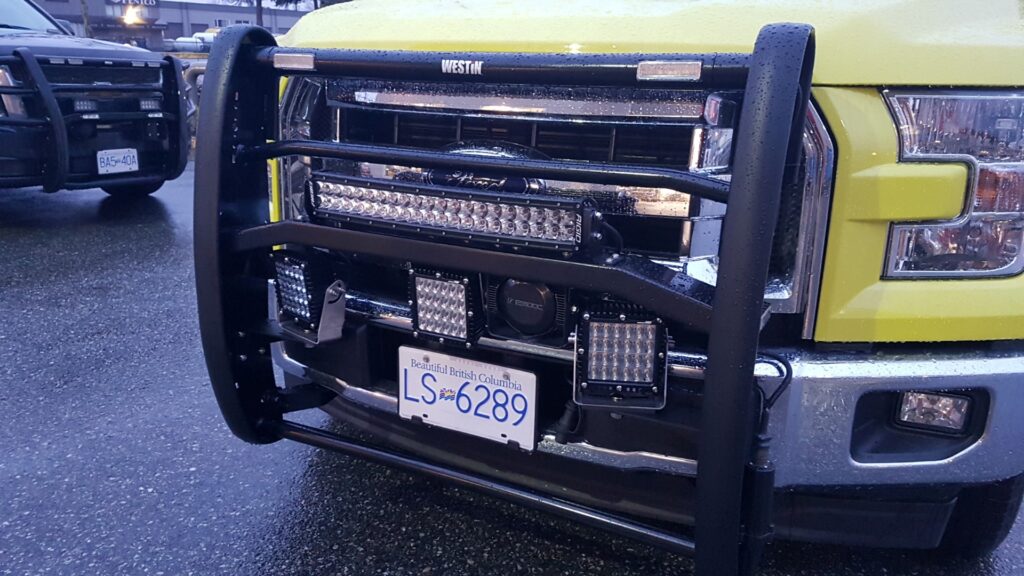
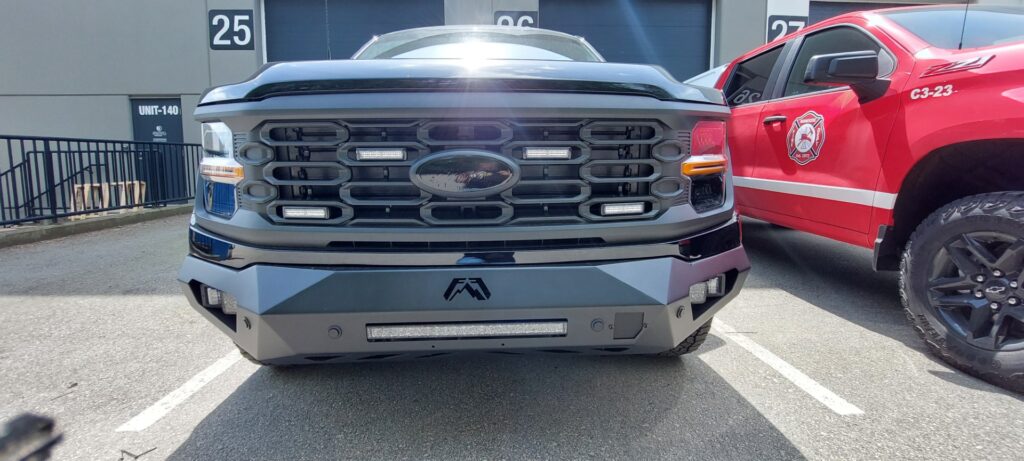
In the image below, you can see 4 grille lights, a 20″ driving light “bar”, 2 x cube fog lights, and 2 x cube Driving/spot lights. In this case we flashed all 4 grille lights plus the 2 x Driving cubes. It came out as kind of a ‘triangle’ warning pattern that looks amazing at a distance. Combined with high-beam wig wags, these vehicles light up! Sorry, no video for this particular truck…
Note that “dual colour” means the entire light head turns red, then the entire light head turns white. This is opposed to “split” colour lights where half the light is red and half is white. Split-colour lights are FAR less effective than dual colour lights.
Traffic Clearing Lights
One unique item from Federal Signal is what they call their TCL (Traffic Clearing Light). While most warning lights have a wide pattern (which reduces peak intensity but gives a wider warning signal), the TCLs are highly focused (roughly a 5 degree beam). These are for front or rear warning, NOT intersection warning. They are designed for ultra-long-distance warning on highways and in urban areas. Their flash patterns are extremely unique and provide a remarkable attention-getting signal. The beam pattern is so narrow that little to none of it spills into oncoming drivers’ eyes, too. These lights are available in multiple colours, and in 2 sizes; 6″ x 4″ (fits in Apparatus headlight housings) and 9″x7″ (designed for placement in the centre of the grille or similar).
Intersection Lights
It’s really surprising to see how many agencies do NOT put a front-corner intersection light on their vehicle. Sticking your nose out into an intersection is harrowing at the best of times, but worse if you don’t have any warning lights facing cross-traffic!
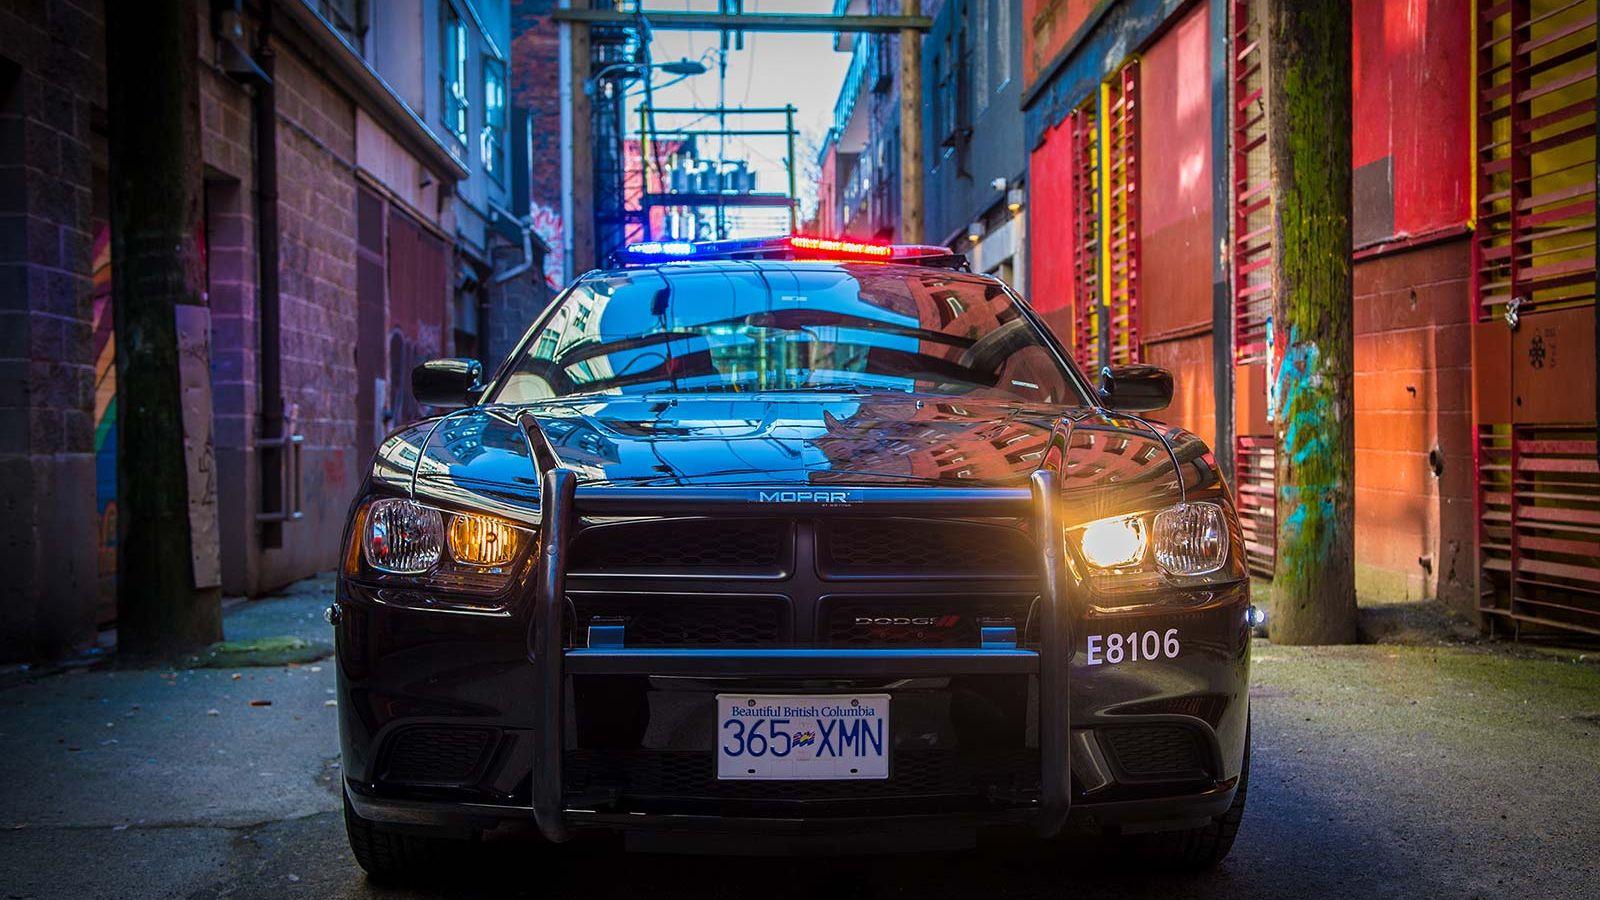
It’s best to put a dual-colour red/white light (or blue/white, or tri-colour red/blue/white) as far forward on the vehicle as possible. If you have a push bumper on the vehicle, put the intersection light there as it gets the light out into the intersection even further than if it’s mounted on the fender.
Side-Facing Lights
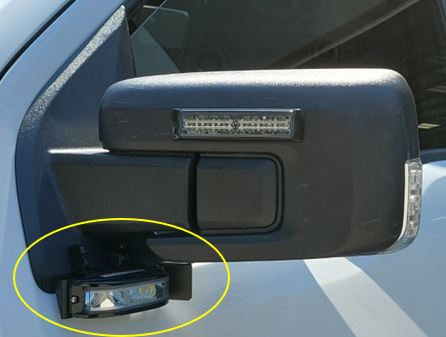
Ok, so an Intersection light is a side-facing light, but let’s not be picky here, ok? In addition to Intersection lights, you can mount lights ON the outside mirror, UNDER the outside mirror, in the rear-door’s window, and on the back quarter-panel.
On-Mirror lights are great for vehicles that can accept them (not all can). They’re fantastic for slick-top vehicles but, if you have to pare your budget down a bit somewhere, and you have a lightbar on the roof, this is a good light to omit (no light is a “good” light to omit, but this is the best of the worst).
Under-Mirror lights are a great addition to marked but especially to unmarked vehicles. We generally use a 180 degree light here, so while it faces sideways, it projects light to front and rear as well. There are various brackets available for common vehicles. These are not the ‘prettiest’ mounting locations from a cosmetic perspective but it’s great warning (sanity over vanity!).
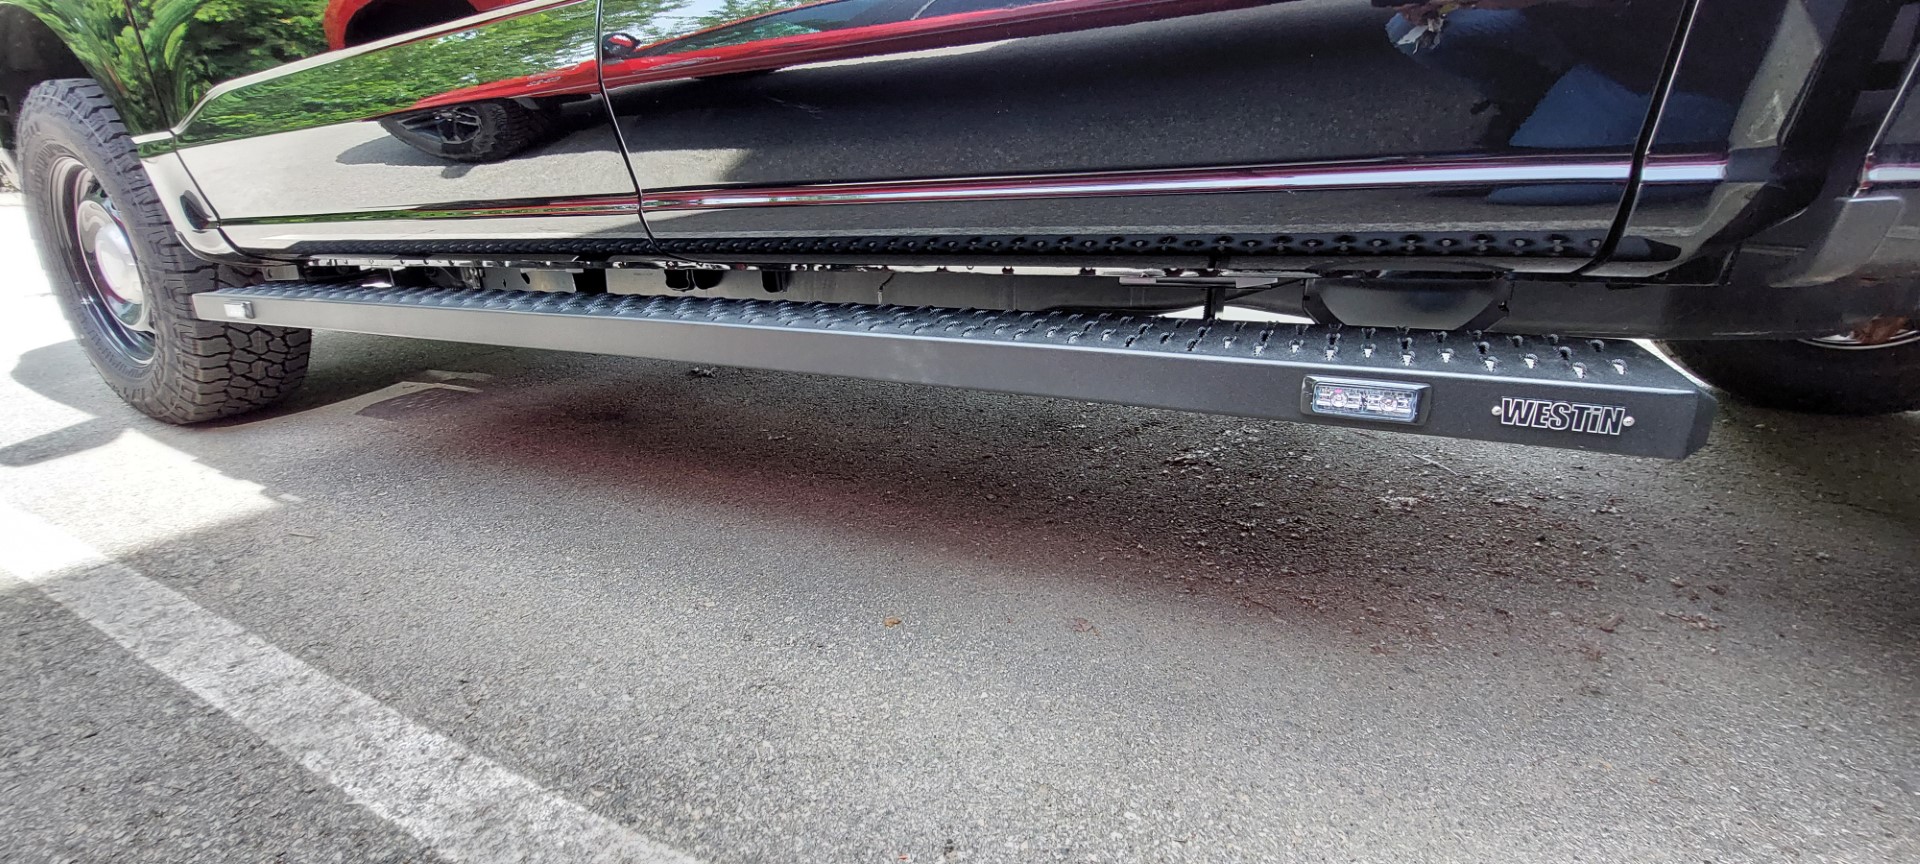
Running-board lights are becoming very popular and can be extremely powerful. They are not ideal for getting into an intersection because they are a) mounted quite low on the vehicle and b) aren’t far enough forward to make a significant difference. But, if you don’t have a lightbar on the vehicle, they really help with side-facing warning functions. Most of the ones on the market are multi-colour capable so you can get side-scene lighting out of them as well as warning. Many can even be programmed to act as a step/ground light when your doors are opened, even when you’re not in warning mode.
Running Board lights tend to be quite expensive. If you want the function but don’t have the budget, 2 or 3 small warning lights mounted on the truck’s running board work very well. No running boards? We have those as well, and it’s cheaper to buy a good running board setup with a few small lights mounted to them, than it is to buy a running board light ‘stick’ setup!
Rear-Facing Lights
This is another “please don’t skimp here” location. If you have a pickup truck or SUV without a lightbar on the roof, these lights are critical to your on-scene safety. On SUVs there are interior “lightbars” available for the rear window of some vehicles. You can also get rear “wing” brackets to mount lights under the rear spoiler on common vehicles (Ford Interceptor, Durango, Tahoe, etc.). Another common mounting location is beside the license plate on an SUV hatch. If you get dual-colour lights with white, you can program the white to be steady-on and use it for an auxiliary reverse light (subject to your Provincial regulations). Please don’t flash white to the rear at any time, as it violates SAE, NFPA, and other standards, and is confusing to motorists.
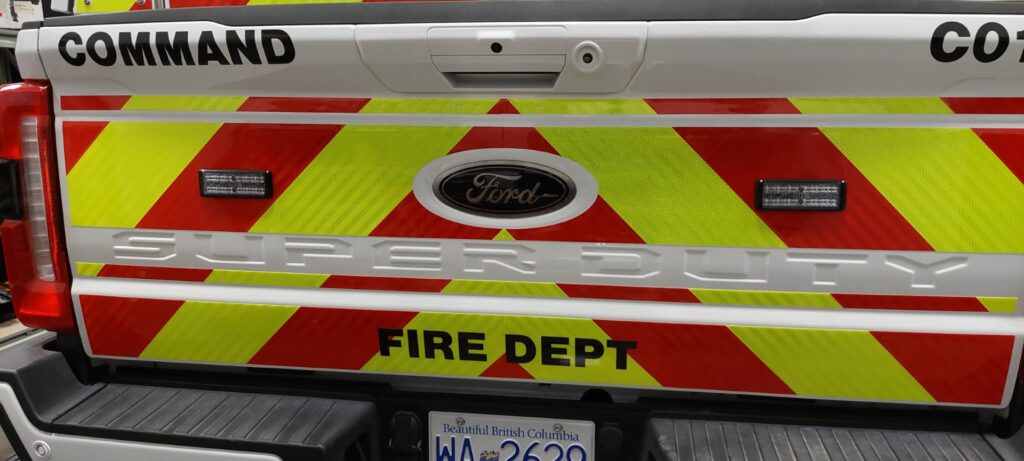
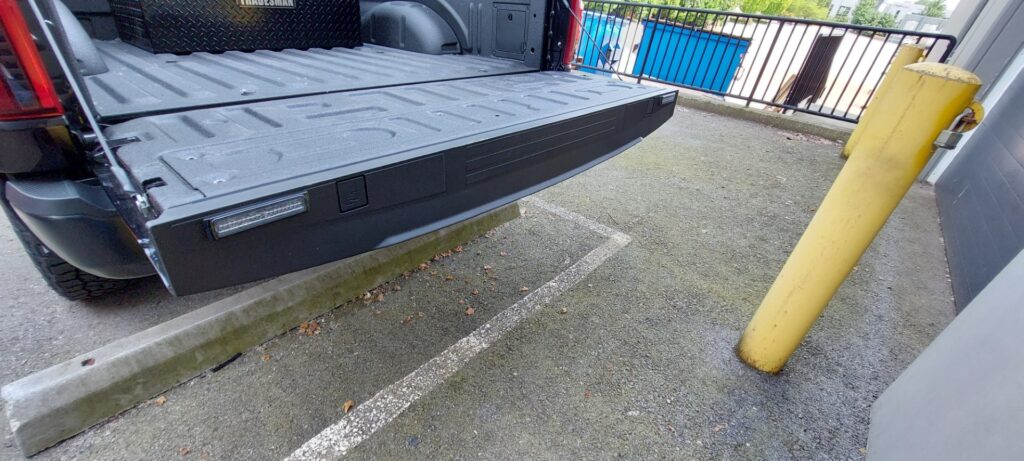
If you have a Pickup truck, you can mount light sin the rear windows (of the truck or a canopy). You can also mount lights directly onto the tailgate. Just make sure they’re not going to interfere with your graphics (or, as we upfitters like to say, “make sure your graphics don’t interfere with our light mounting locations”!). A couple nice 7″ x 3″ lights (or similar size) look great on the tailgate of a pickup truck, and provide excellent rear warning. If your tailgate is down at scene, consider mounting some smaller warning lights on the top of the tailgate! They shine skywards when the tailgate is closed, but shine rearwards when tailgate is open. See image below.
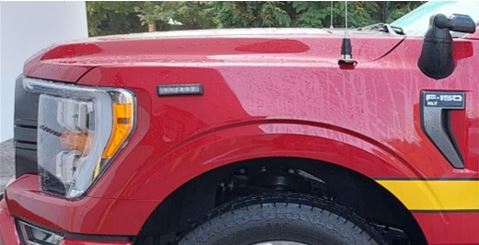
While in the past it’s been popular to mount lights inside the tail/reverse light housings on vehicles, this is getting more and more difficult to do with modern vehicles as most (not all…yet) vehicles come with LED tail lights that cannot be flashed (exceptions may be on Pursuit vehicles where the factory has integrated a flashing function). Note both F-series trucks in the images above have LED tail lights that we cannot flash.
Regardless of what you do for warning on your pickup or SUV, make sure you take into consideration how much warning you’ll be left with when the tailgate / hatch is open! It’s all great to put a ton of great lights on the hatch of a Tahoe, but if you leave the hatch open at scene, all that warning light shoots skyward and you’re left with zero warning to the rear (though, you probably won’t get hit by a helicopter…)
If you’re still reading, congratulations! You now know more about warning lights than most people do. Think of how much more fun you’ll be at parties now!
As you can see, we’re pretty passionate about keeping First Responders safe. We’d love to help you with any questions you have about warning systems in general, or particular products, etc. Check out our other Blog posts for information on Lightbars, Siren systems, and other aspects of warning systems for Emergency Vehicles.
Feel free to contact us and we’ll be happy to work with you to provide suggestions that work within your budget and other constraints.